I completed not one, but two half scale shower surrounds today — one for the Victorianna and one for the long-dormant Queen Anne Rowhouse. (Besides shingles, the bathroom is the last big thing I need to finish in the Rowhouse…)
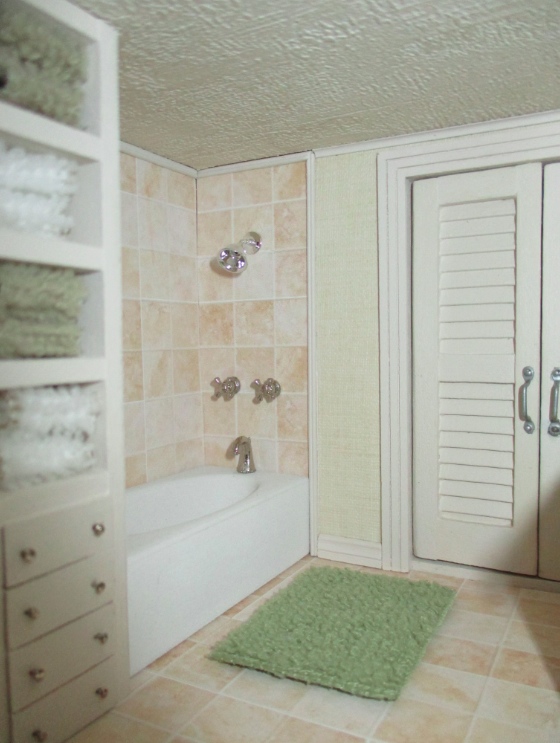
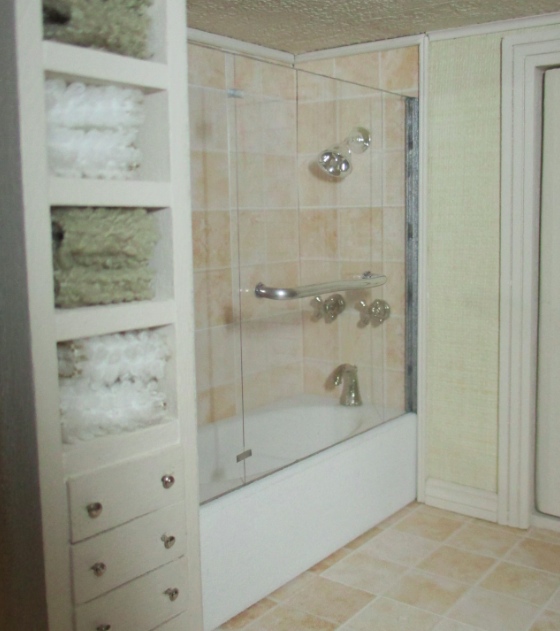
For reference, here’s what I started with in the Victorianna:
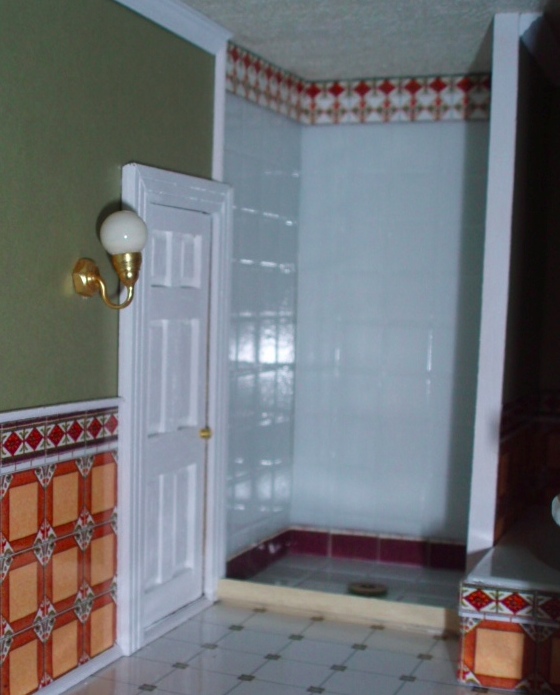
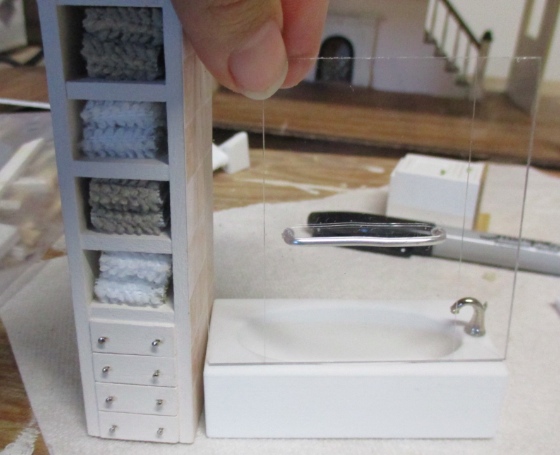
And in the Rowhouse:
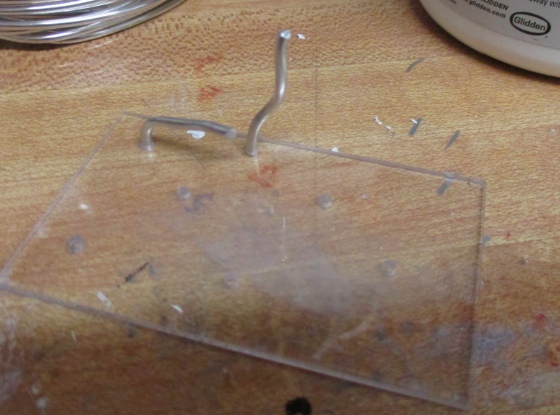
I bought plexiglass for the two showers from Tap Plastics, where they cut it down to size for me. I got one squarish piece for the Victorianna, which will have a fake door, and two tall skinny ones for the Rowhouse, which will have a working sliding door. The minimum price for a cut piece of plexiglass is $1 and the pieces I bought were small enough to fall under that threshold, so I ended up paying just $1 a piece, and after he finished cutting the guy let me have the leftover scraps for free.
This is one of those scraps. Geoff used the drill press to drill holes for the handles, and he practiced on this to make sure the plexiglass wouldn’t crack. I then used it to make sure I could glue in aluminum wire without making a big mess. Success on both counts!
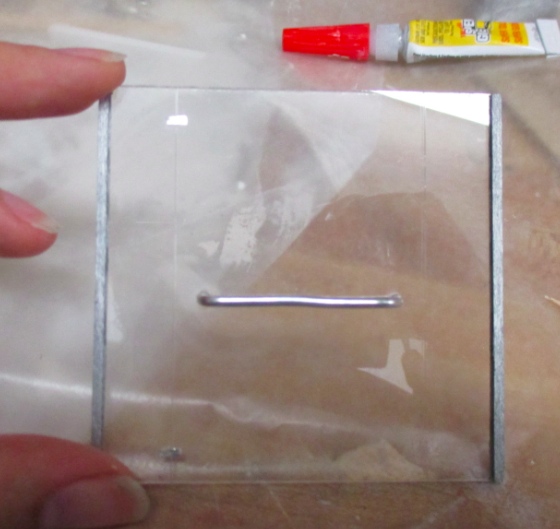
Here are the two doors with handles. I glued in the handles by dabbing the ends in Super Glue before sticking them through the hole — it holds well and I managed to do it without smearing it all over the place. I chose to do horizontal handles on both of these so they can double as towel bars.
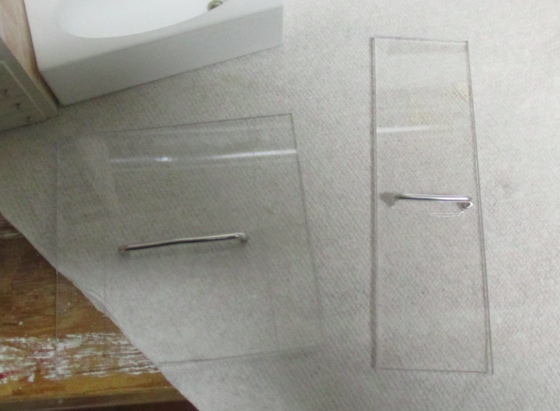
It’s hard to see in the photos, but on the Victorianna’s surround I scored lines on the sides to create the illusion that there are two glass panels with a door in the middle. (I got that idea from Otterine’s blog.) I used a new Xacto blade and a metal ruler to do the scoring.
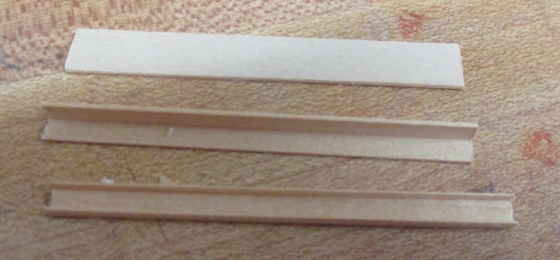
I got basswood channel molding just the right width to hold the plexiglass in place, and “painted” it with silver Sharpie.
I glued these to the edges of the plexiglass, again with Super Glue. I used a toothpick to dab Super Glue to the sides of the plexiglass to reduce the risk of any squeezing out onto the surface.
They’re tough to see because of the flash, but I also added two fake hinges to the left side of the door. I cut these from a piece of aluminum sheeting. To attach them, I used a toothpick to put a small dab Super Glue on the surface, and then put the tiny piece of aluminum on top of it and pressed it down with the toothpick for a few seconds until it bonded. No mess!
I glued in the tub. Then I applied Tacky Glue to the back sides of both pieces of channel molding, and glued the surround to the wall. There isn’t any glue where the bottom edge of the plexiglass meets the tub. The piece of double bead molding I made to surround the shower helped me keep the plexiglass straight.
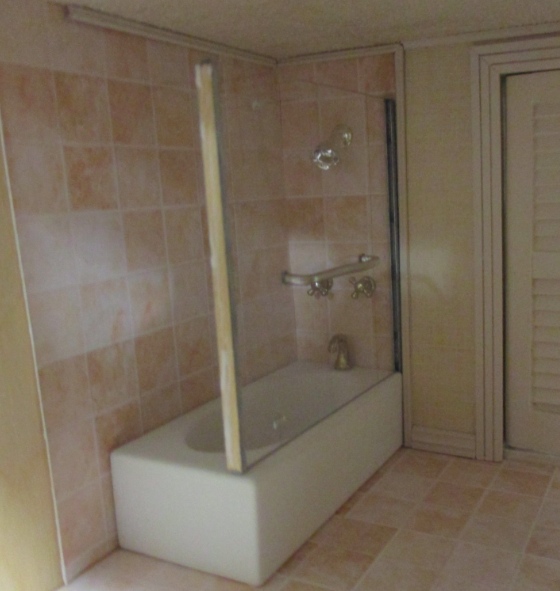
Finally I glued in the linen closet. In this picture you can see the fake hinges a little better.
There’s just one thing I wish I’d done differently: to glue the plexiglass to the channel molding, I put several dabs of Super Glue on the edges with a toothpick, not realizing that those spots would be darker than the non glue spots. It might have been better to spread glue along the edge instead of dotting it, but then again more glue = more risk of mess, so who knows.
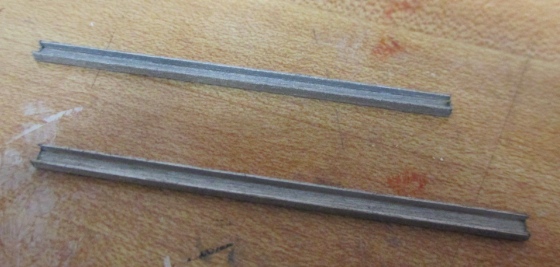
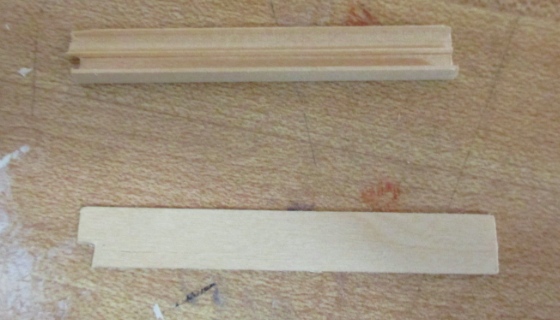
Moving on to the Rowhouse. This one will have a working sliding door, so I started by making track pieces for the top and bottom. These are made from a piece of channel molding and a piece of corner molding, glued together. The flat piece goes on top to hold them together.
The bottom track needs to be slightly shorter in the front to accommodate the bathroom door trim.
I painted the tracks white. Then I glued in the back plexiglass piece to add stability to the whole thing. The front piece will slide in front of it.

My process for assembling this was to glue in the bottom track with plexiglass attached, put the second door in place, and then glue in the top track. The shower isn’t quite square and it was hard to get my hands in to position everything but I managed to do it without making a big mess or getting any glue on the plexiglass.
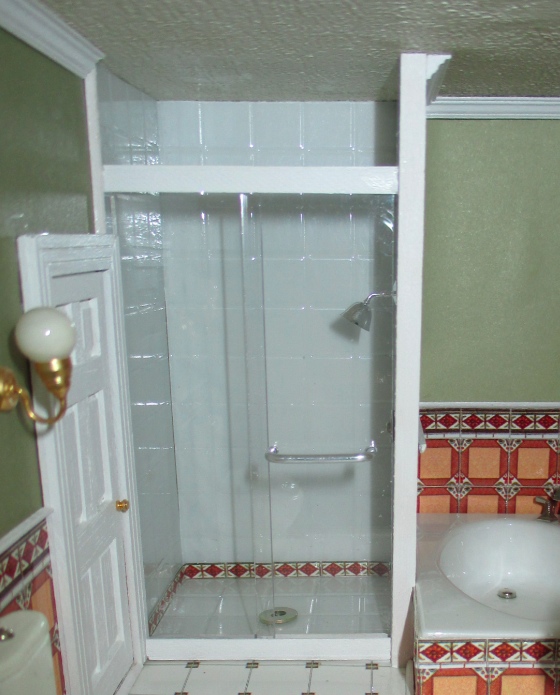
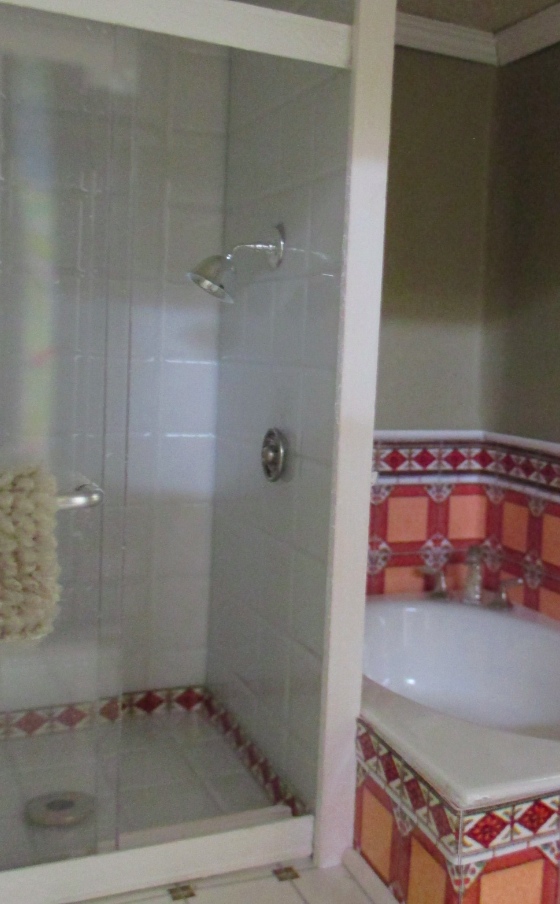
Here it is with the door open. You might have noticed that I simplified the shower a bit from the “before” photo above… I wasn’t happy with the tiles at the top and bottom so I pulled them out and added a simpler decorative tile around the bottom.
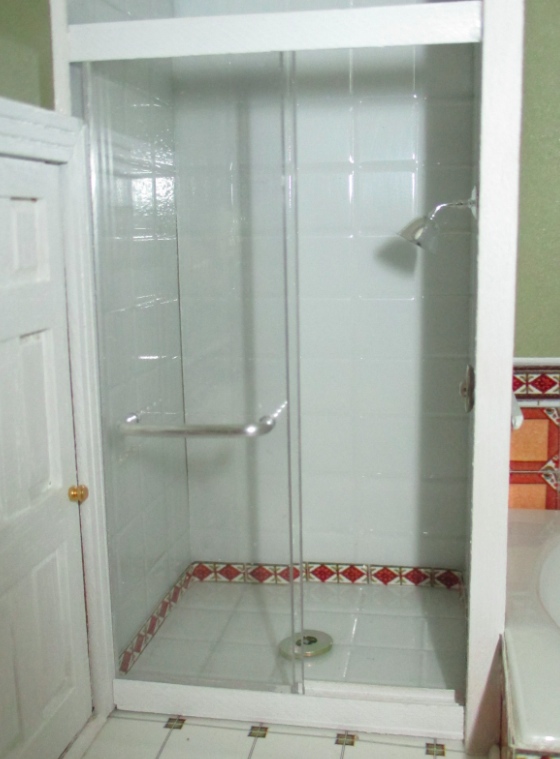
The shower hardware is made from a 1:12 silver wine glass with the stem bent, and half of a snap. The drain is a washer.
I have a few more pieces of trim to add to the Rowhouse bathroom, and towel bars, and it’ll be done. I’ll post some pictures of the whole room then.
 Emily is a freelance writer, miniaturist, and adventure game enthusiast.


Wonderful job, it all looks fantastic. I especially like the wine glass shower heads, very clever!
Great work on both showers. What a clever idea to make the showers from a wineglass and snap fastener – works really well. It’s good to see that using super glue on the plexiglass doesn’t cause it to frost, I wondered whether that would happen.