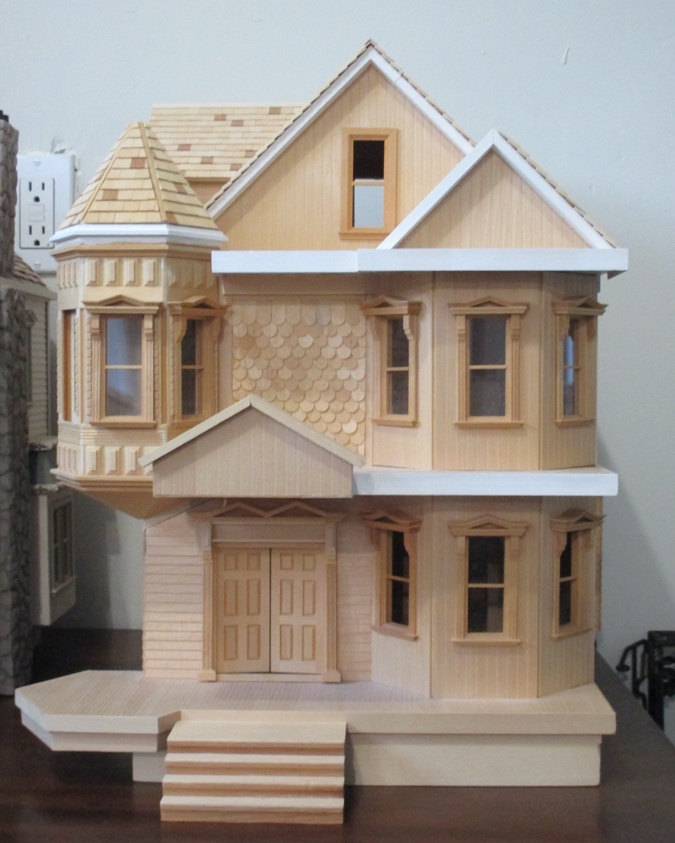
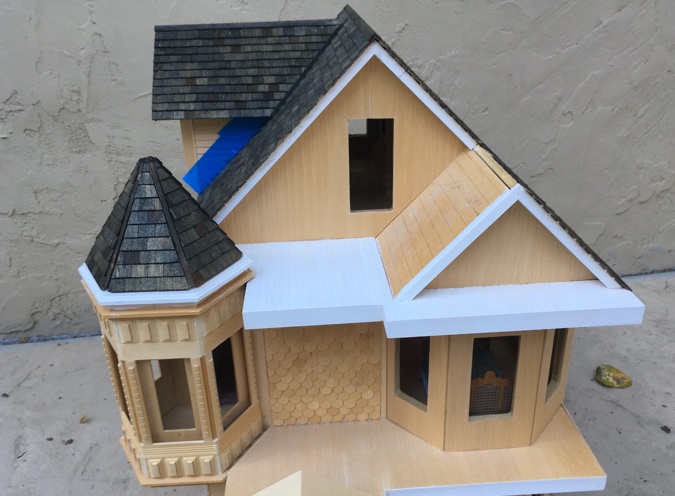
Since my last post, I have spent a lot of time staring at the Turret House. It came with windows and exterior doors but no other trim, which I guess is good because I can make it look how I want. But I also have to try to figure out what the builder intended to do. It’s a challenge to complete someone else’s vision when I don’t know what that vision was.
The Turret House looked like this when I got it:
I already have several light-colored dollhouses, including the Victorianna, the Gull Bay, the Little Belle, and the Queen Anne Rowhouse. I want the Turret House to be bold. I did some searching and came across this inspiration house on Pinterest. I envision the Turret House being more red than this one, but I love the dark blue trim and the gold accents.
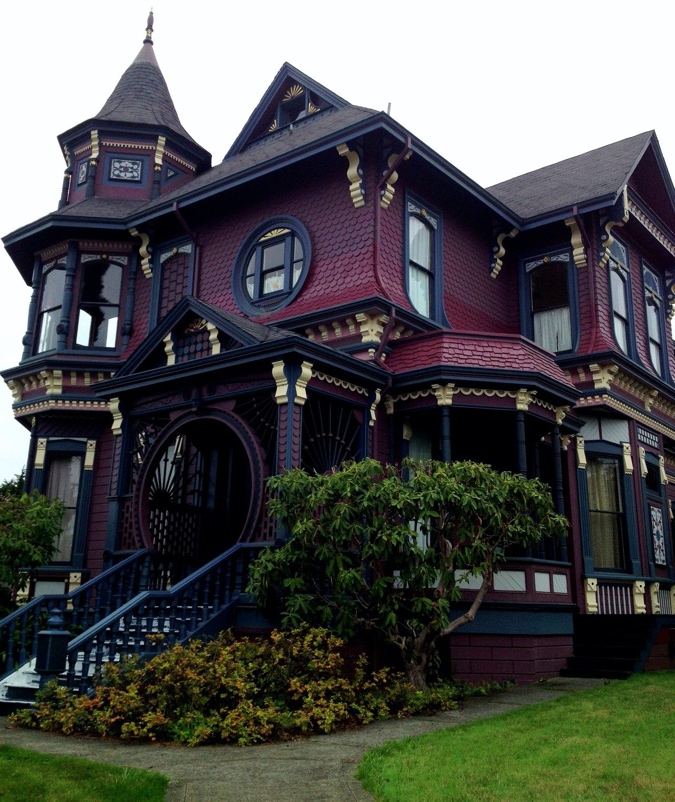
(I can’t figure out where this picture originated, to give credit for it. If you know, please post in the comments!) This is the Bair-Stokes House in Arcata, CA, built in 1888. PriceyPads.com has some historical pictures with other color schemes. I like the bold colors best.
While I was waiting for some orders to come in the mail, I started by staining the shingles with Minwax Ebony. I’ve always stained shingles before gluing them on, so the fact that the shingles are already attached made me nervous. I’m not complaining — gluing on shingles is tedious and I’m glad it’s already done! But stain doesn’t cover glue, so I wasn’t sure how they would turn out.
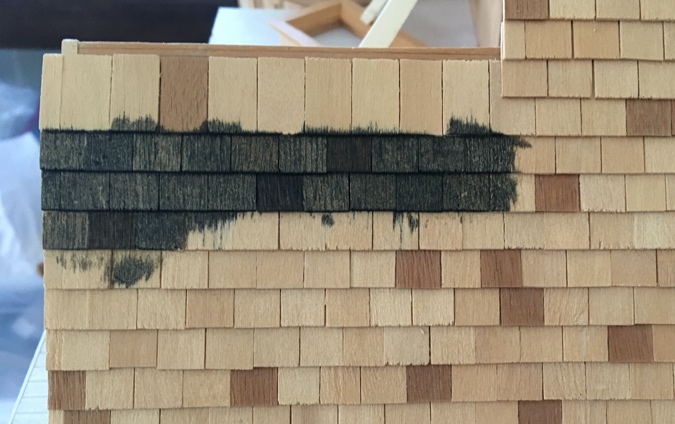
Not bad! There are some spots where the stain didn’t take, but I should be able to mask those with black paint or a wash.
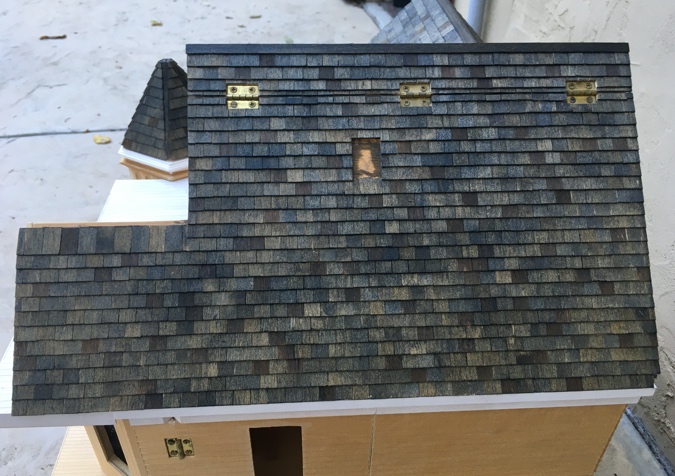
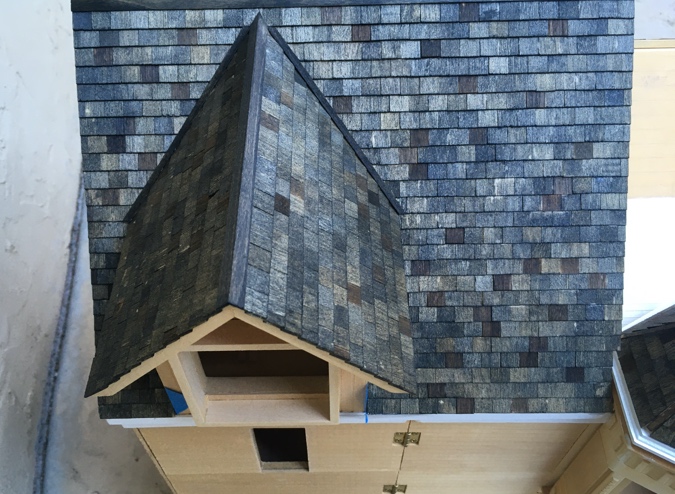
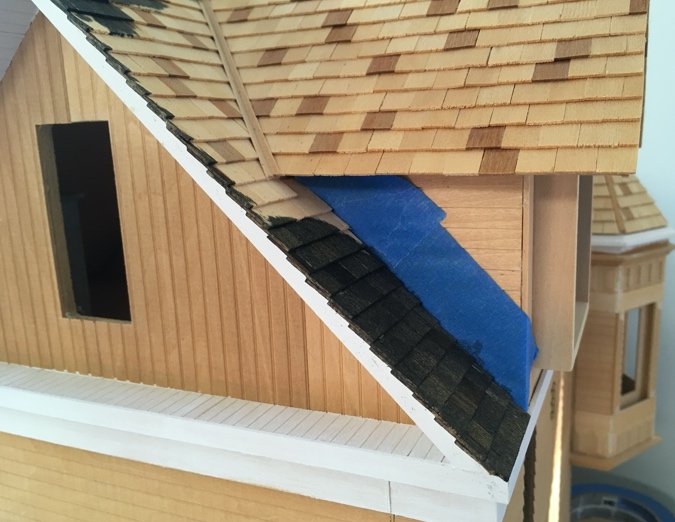
I have to add shingles to the left side of the gable, but I’ll stain those before gluing them on. I’m not as neat with the glue as the person who started this house!
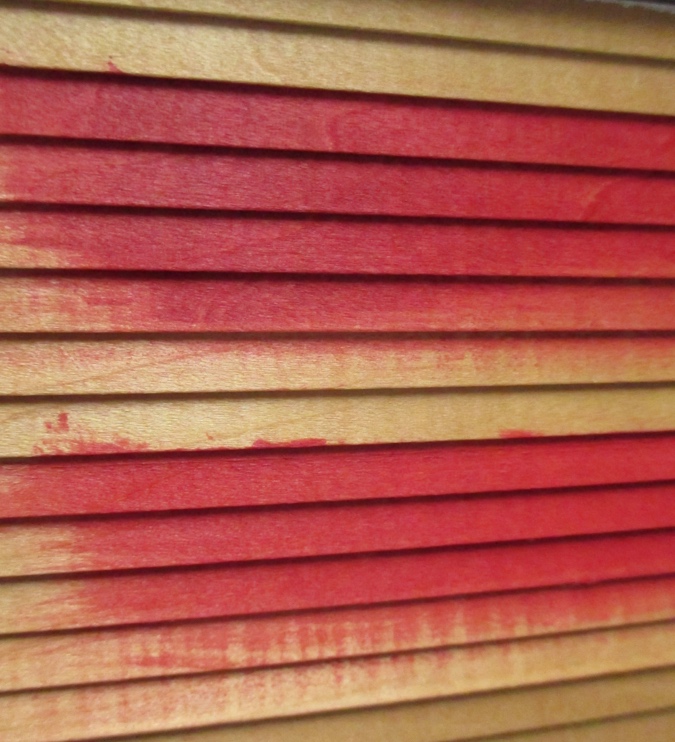
I bought paint samples off the Home Depot website. Whenever I go to the paint counter there I get overwhelmed by all the color choices, and I hate waiting around for them to mix the paint, so I decided to take my chances with mail order.
I got two different reds — the one on top is Behr Dark Crimson and the bottom color is Timeless Ruby. They look almost exactly alike. I decided on the Dark Crimson (the top color), which is just a touch darker.
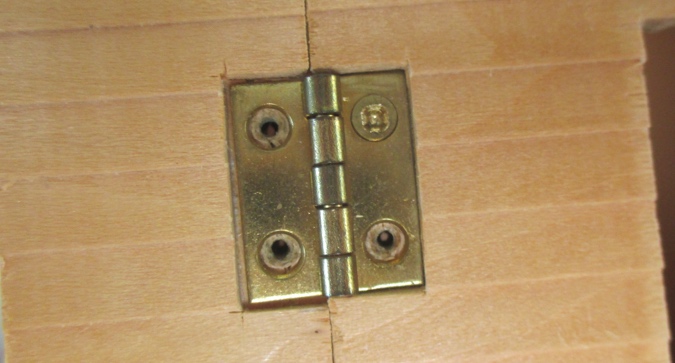
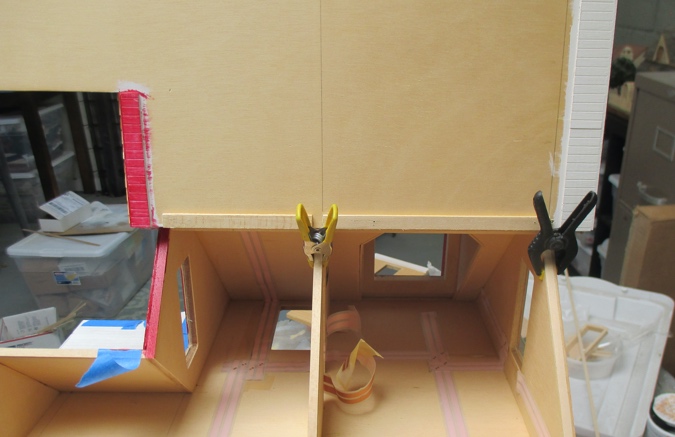
First I removed the three hinged wall panels to make painting easier. While I was at it, I had noticed that two of the screws in the roof hinges are straight and all the rest are Phillips head. This bugged me, so I decided to fix them.
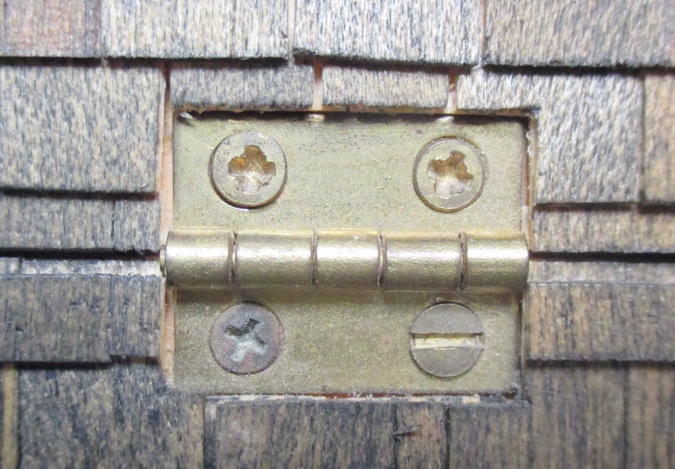
Turns out they were mismatched for a reason! All of the screws are slightly too long, and the builder added strips of wood on the opposite side of the panels to prevent the screws from sticking out. The roof screws that don’t match are positioned just above the wall pieces that the roof rests on top of, so the added stripwood that prevents the screws from sticking out can’t extend that far.
I found this out the hard way: by screwing in a new screw and then wondering why the roof panel wouldn’t open. (Because I had screwed it into the wall!) The straight screws are shorter than the Phillips heads, so they don’t have this problem.
I had some more of the shorter straight screws, so I replaced all of the screws in the roof with straight screws. At least all of those match now.
But that wasn’t the only screw problem. A couple of them are stripped out and trying to get them out only made the problem worse. I’ll sweet talk Geoff into helping me drill them out.
With the panels removed, I started painting. The builder used glossy white paint on some of the trim pieces. I don’t want any glossy white trim on this house, so I will either paint over it or cover it up with other trim as I go along.

The hinged roof panel won’t stay open on its own. I could have removed it when I was messing with the hinges but it didn’t occur to me at the time. I was able to prop it open using clamps.
The glossy white paint is hard to paint over. Also, the shingles extend over the edge of the roof by about 1/8″, and I don’t want to get paint on the underside of the shingles by trying to paint that trim. (I also haven’t stained the undersides of the shingles yet, because I was concerned about getting stain on the trim…) I think the solution is to paint strip wood and then glue that over the white trim.
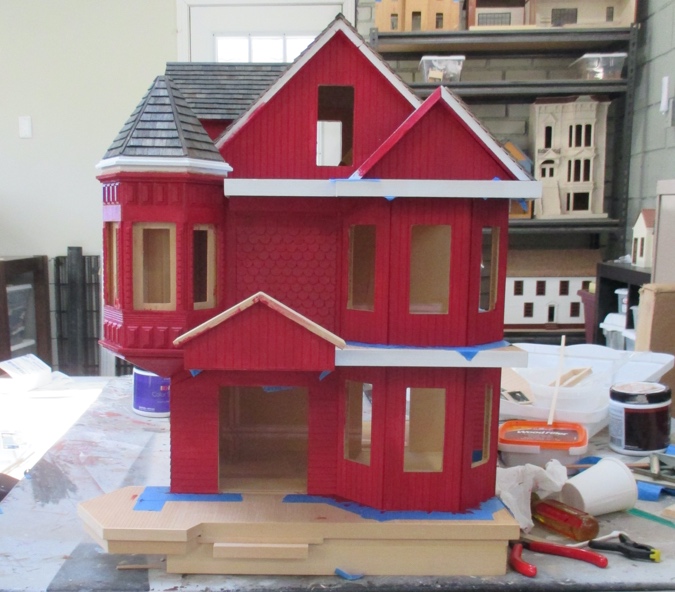
My dark blue trim color is Behr Blackberry Cobbler. I’ll talk about trim in my next post, but here’s a sneak peek.
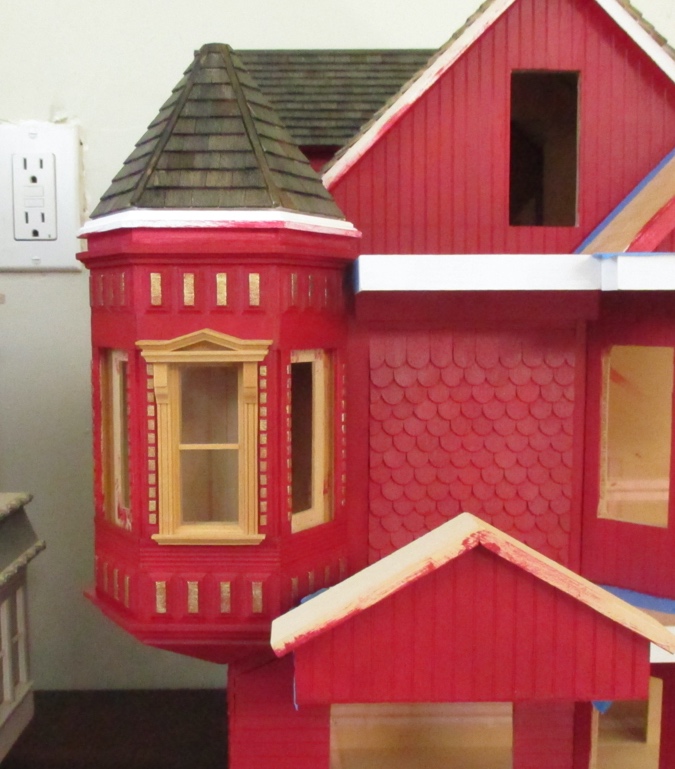
I wasn’t sure what to do with the turret so I started by painting the whole thing red. Then I started playing with gold accents, like in the inspiration picture.
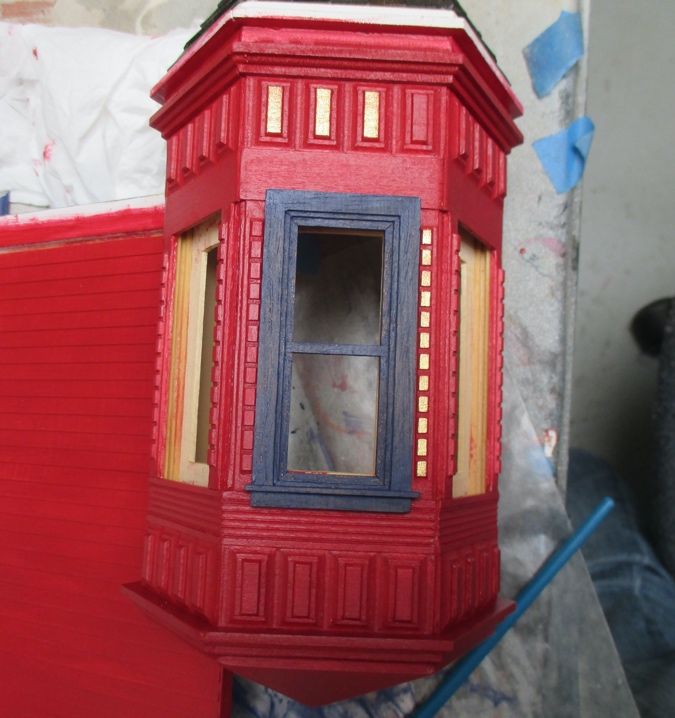
It seems like there should be some blue on the turret but I’m not good enough at detail painting. If I had built this house, I would have painted some of this trim blue before gluing it in. I am going to try to go over the crown molding with blue, but first I need to get some chisel paintbrushes so it’ll be easier to paint straight lines.
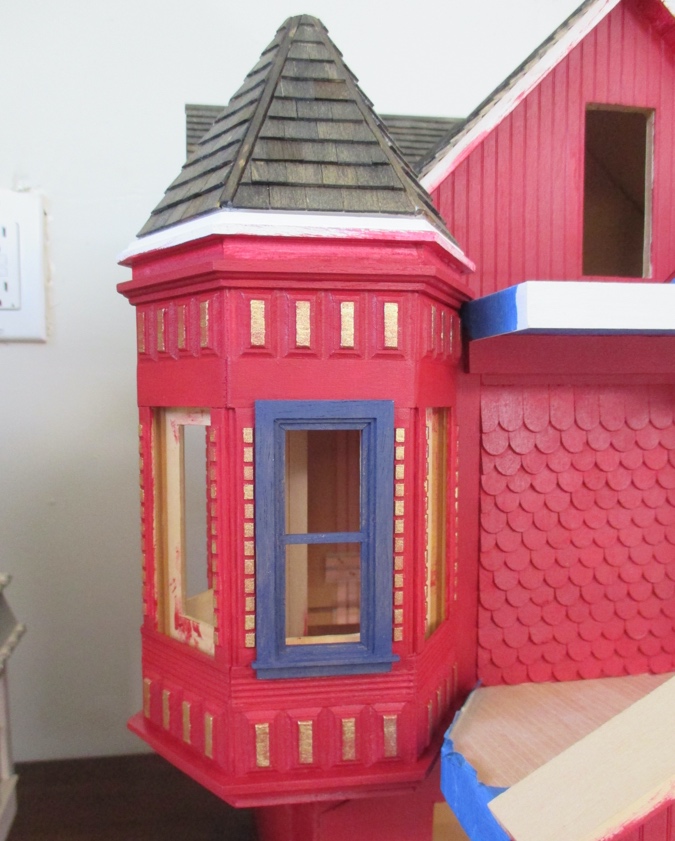
This house came with Victorian windows for the turret. I planned to use plain windows instead, but now I’m leaning toward the Victorian windows again. The blank space above the window really needs a pediment to fill it up.
 Emily is a freelance writer, miniaturist, and adventure game enthusiast.


Hi Emily,
That is the Bair House in Arcata, CA. Here’s a cool link showing it with various paint colors over time. https://www.priceypads.com/1888-queen-anne-victorian-bair-house-in-arcata-california-photos/
Thank you! I’ll add this info to the post.
Wow! It’s going to be gorgeous! Did the house come with that gable trim? It’s so different, I wonder if the builder made that, too?
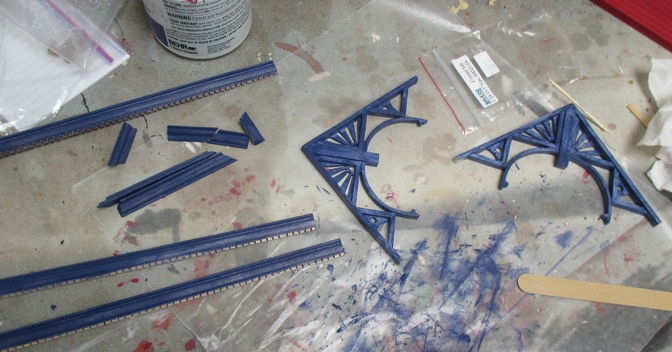
The gable trim is made by Lawbre. I bought it years ago at a mini shop, but Lawbre also has a website where you can buy their components. It’s 1:12 scale but I always thought it would work fine in a half scale house, and I considered using it on the Queen Anne Rowhouse, but iirc I bought it after the Rowhouse was already trimmed up, so I set it aside for my next Rowhouse.
They have a smaller gable trim with the same sunbursts — I bought two of those to go in the smaller gables.
It looks like it will be perfect for this house. Good choice!
Fantastic colors! The gold really adds something; love it!
Thank you! Years ago I started a 1:12 house with gold accents but I never finished it. The gold adds over-the-top pizazz, I love it.
Totally agree with you on the turret windows! I love the gold accents.
The white paint…could you lightly sand the trim and then paint over it? My concern would be adding trim and then the shingles don’t line up with the trim correctly, like the trim sticks out past the shingle bottoms?
I love your blue trim pieces! They’re going to be so pretty on the house.
Luckily the shingles overhang the roof trim by about 1/8″, so my new trim won’t stick out past the shingles. I wonder why the builder did that — if it was just for aesthetics or if they intended to put something else there. (If so, why bother painting it?) Putting a piece of trim under them will also add stability, the edges hanging over seem like they could break off easily.
You are very brave with a such a bold red and it will be gorgeous. This is such a cool house. I, too, get overwhelmed looking at paint chip samples, which I still have to do for my Manchester. You are doing a wonderful job.
Thank you!
A dramatic colour scheme for the house…the deep blue and gold will certainly add dimension and interest to the house and a very pretty. It’s always so nice to find an inspiration photo that captures the vision…it is a beautiful house!
Thanks. :)
Emily – this is truly a gorgeous house plan and I LOVE the plans you have for bringing it to life. I also love the effect you got when staining the roof shingles. The various way individual shingles took the stain just adds to the realism. It’s absolutely beautiful already and is heading to spectacular! – Marilyn D.
Beautiful! Love the colors and you inspiration!