After a long hiatus, I’m back to work on the Victorianna’s master bathroom. The problem with getting distracted mid-project is that it takes a while to remember what I was doing and what I planned to do next. The last time I worked on this, I had made good progress on the vanity and linen closet, then needed to pause until I could make a trip to Tap Plastics — which is ~40 minutes away, across the Golden Gate Bridge — to get plastic for the shower. I bought that last fall and it’s been sitting in the unfinished bathroom ever since.
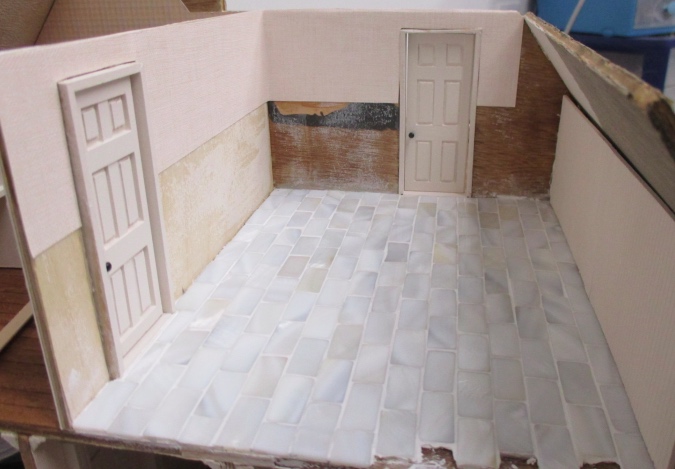
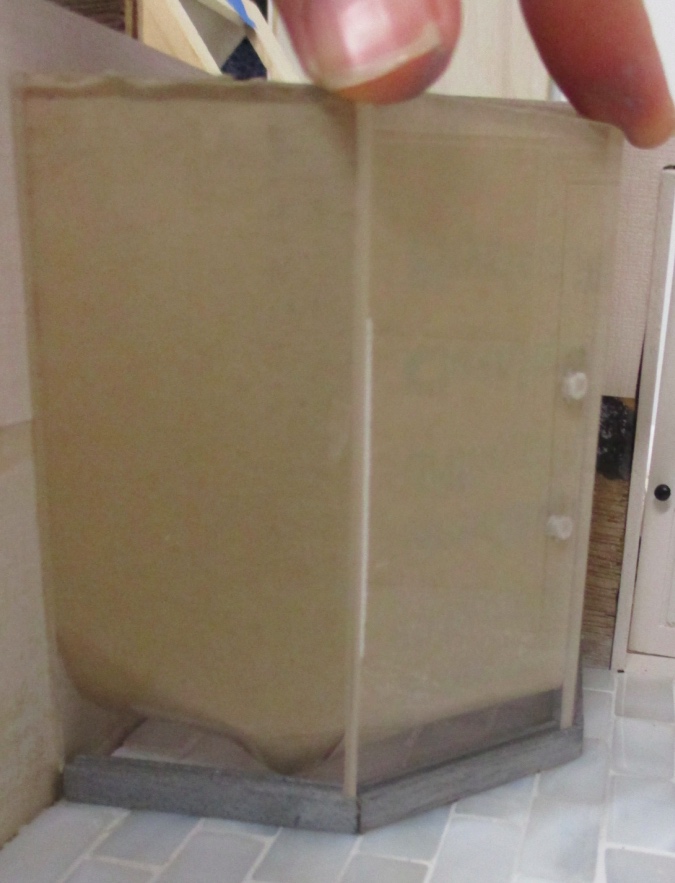
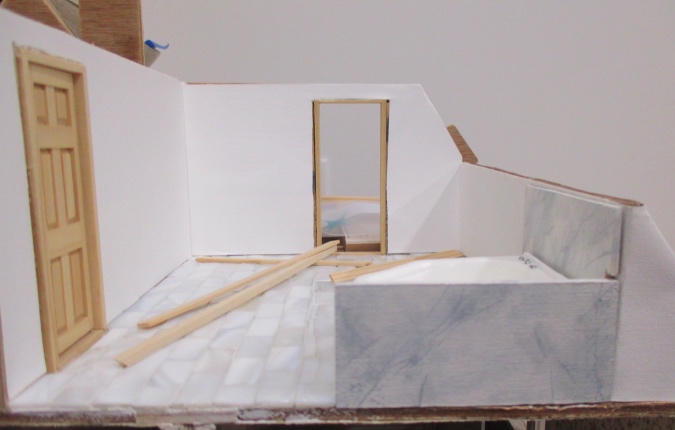
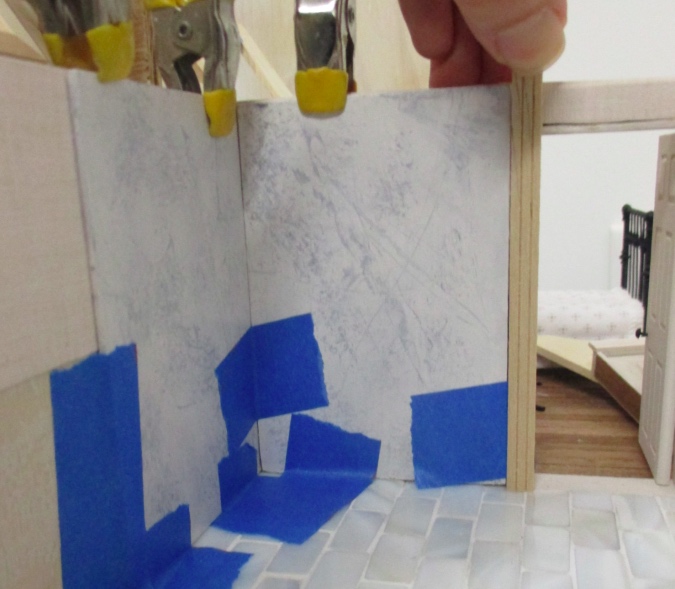
To refresh your memory, here’s the bare bones bathroom. The wallpaper only goes halfway down because there will be beadboard wainscoting at the bottom. The door on the left leads to the nursery, and the one at the back to the master bedroom.
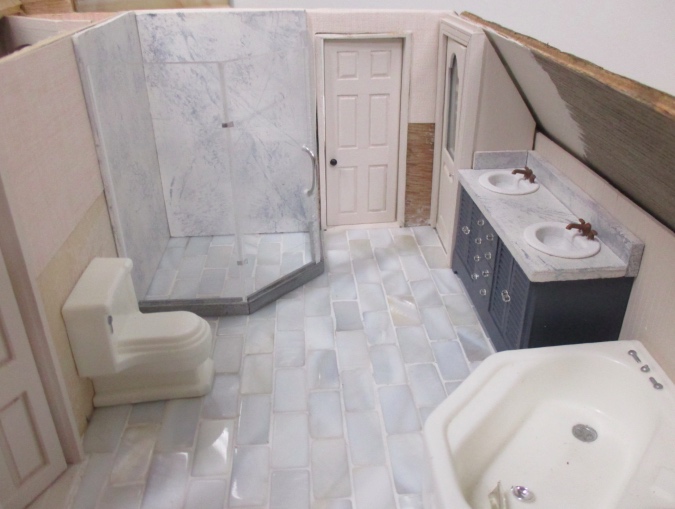
Here’s the layout of the bathroom. The corner tub is cast in resin from a Marx bathtub, purchased from Atomic Kiki on Etsy.
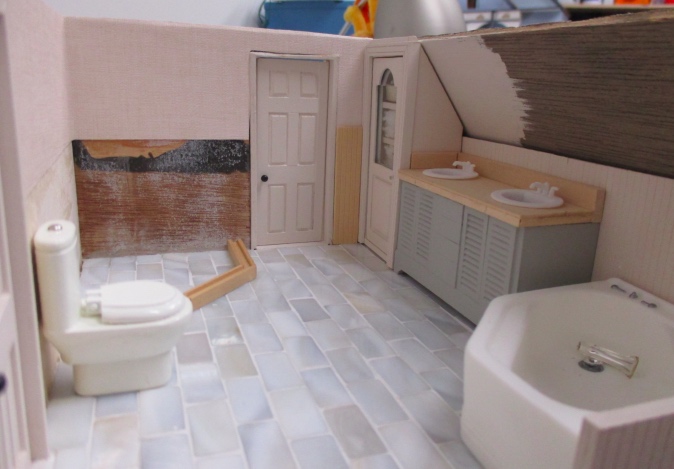
The bathroom is large but the sloped ceiling limits what I can do along the right wall, so I decided to do a separate tub and shower with the tub in the short corner and the shower in the tall corner.

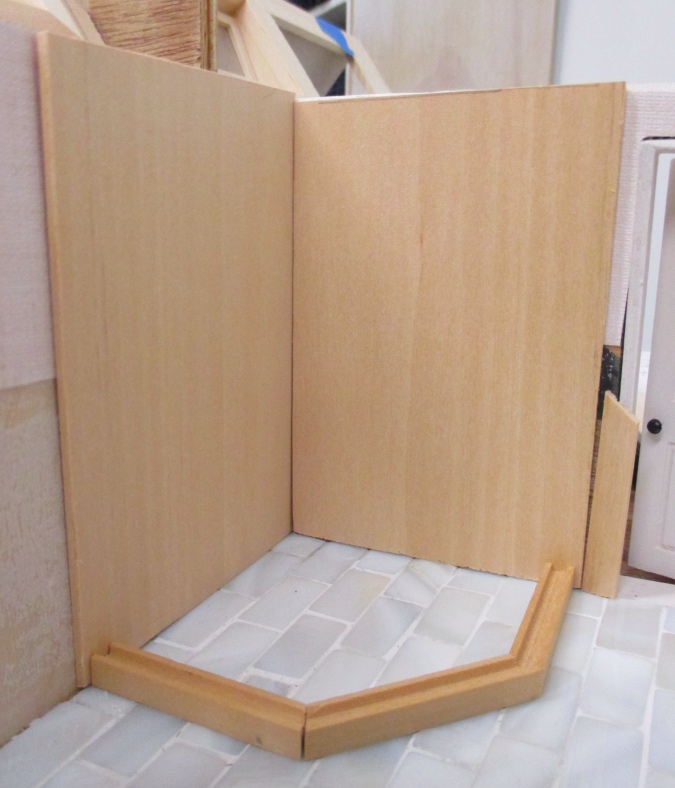
Here’s the shower mock-up. The bottom pieces are porch railing base. The surround pieces are the same beadboard I’m using on the walls, but with the scribed part turned toward the wall. I used this rather than regular basswood because the scribed lines make it easy to cut straight. Thin basswood is so soft that when I cut with a utility knife along the grain, I usually end up with a horribly wavy cut.
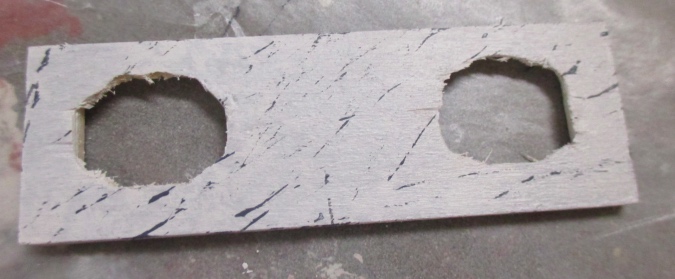
I put off building the shower for so long after buying the plastic because I needed to drill holes for the handle, and the idea of drilling those holes scared me. (As you may recall from the Blackbird Bar’s optics, drilling holes is not my forte.) I ended up getting Geoff to do it for me. I also needed to bevel the edges so the pieces would meet at an angle, which I did with the belt sander.
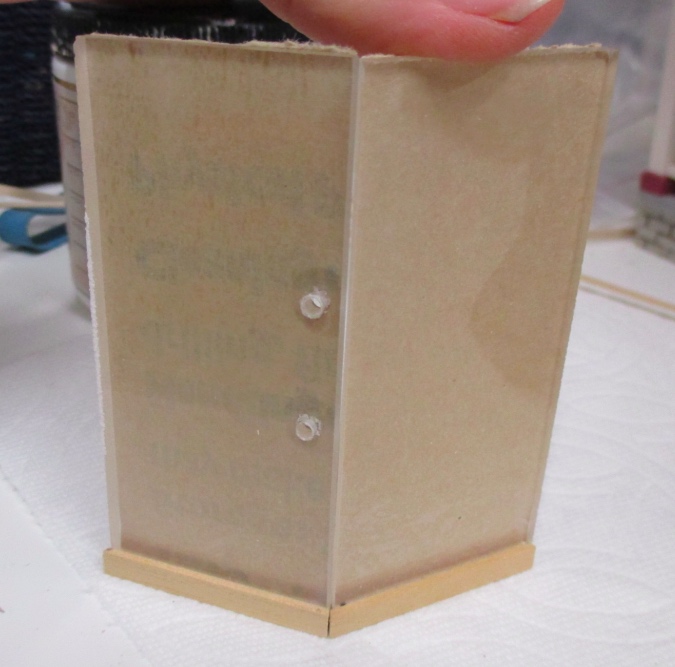
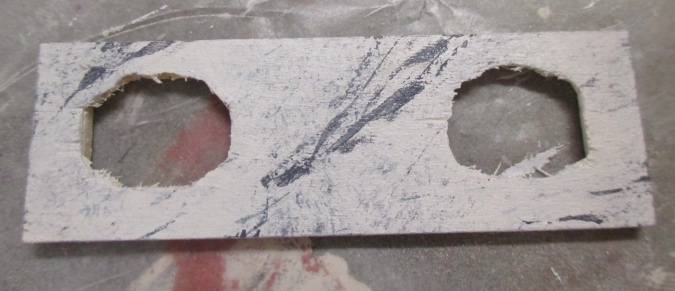
I “painted” the base pieces with a silver Sharpie, then glued them together.

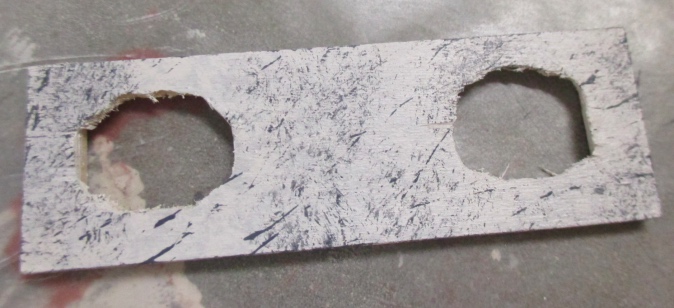
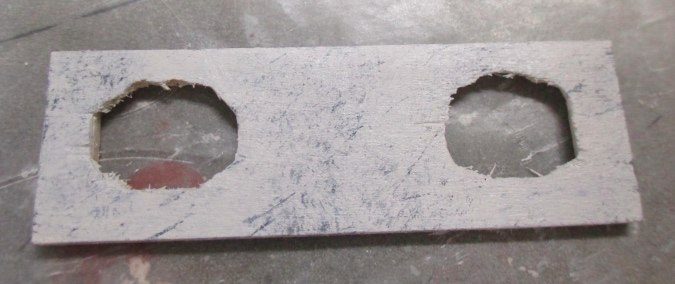
Next I checked the edges and sanded a bit more to make them fit together as snugly as possible.
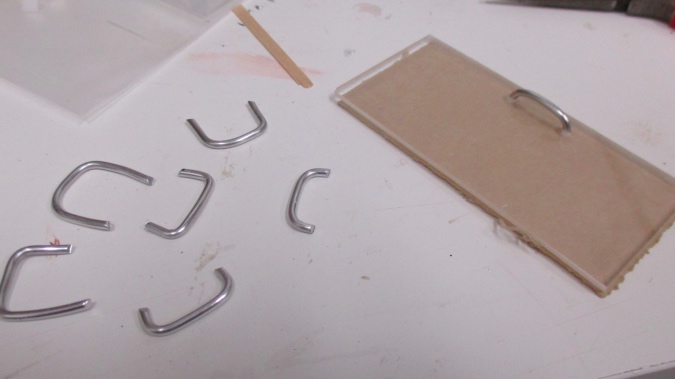
The door handle is made from soft metal wire that can be bent easily with needlenose pliers. I made several handles before I got the size and the curves right.
To glue in the handle, I put a piece of Scotch tape on the back (to cover up the holes where the drill had gone through the paper backing), and then dotted Super Glue on the handle ends and stuck the ends in the holes. The tape was there to keep glue from spooging out the back. After a few minutes I peeled off the paper backing (with the tape attached). A little glue did spooge out, but acetone cleaned it up without damaging the plexiglass.
WARNING: I later tried acetone on a different piece of plexiglass, for a different project, and it made the plastic foggy. I spoke to the people at Tap Plastics about this and they said you should NEVER use acetone on plexiglass, it will usually fog it up and ruin it. I don’t know why it didn’t fog up my shower but they convinced me to never try it again! Windex and Goo Gone are also bad. To clean glue residue off plexiglass, they recommended plain old soap and water or a product named De-Solv-It. Now back to your regularly scheduled blog post…
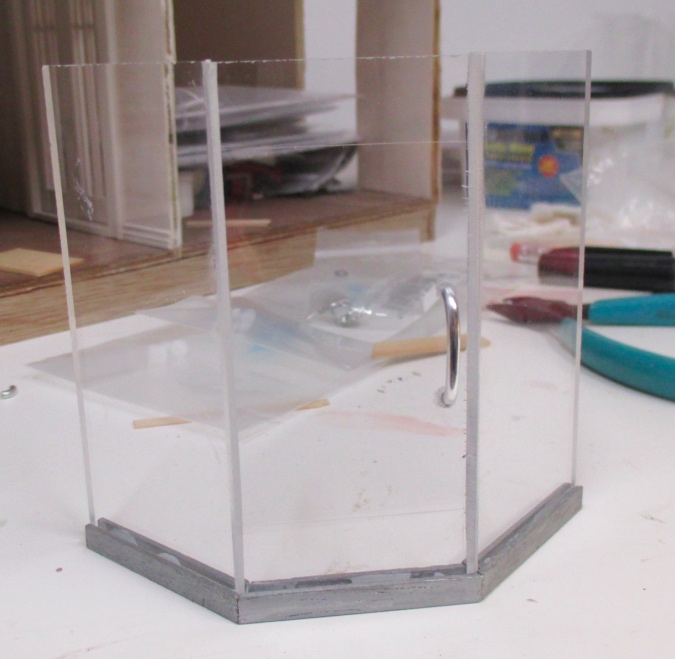
I used an Xacto knife to add score lines to the door piece, to create the illusion that this is a door set into a larger piece of glass — you can sort of see them in the photo below. To assemble the shower, I glued the bottoms of the panels into the base pieces with tacky glue. While that was still wet, I ran a bead of super glue along each of the seams and pressed the panels together. That glue bonded within a few seconds to hold the panels in place while the tacky glue dried.
Once again, glue smears got cleaned up, and then I used a microfiber cloth (the kind you clean eyeglasses with) to get rid of dust and fingerprints.
Finally, I added two fake hinges to the door. These are cut from a piece of aluminum and glued on with a dot of tacky glue.
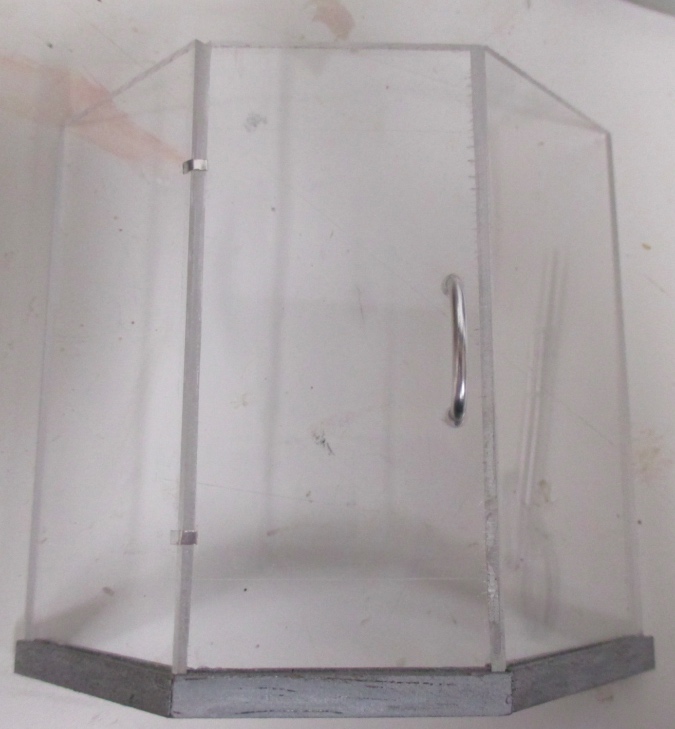
The picture above shows something I didn’t notice until after everything was glued together, that makes me want to cry: there are a series of little slices running down the right side of the door piece, that must have resulted from my sanding the beveled edge. I’m not sure if they were there all along but I didn’t see them due to the paper backing still being on, or if they were invisible until the glue seeped in and made them visible. Either way, they look bad and I’m sad about it, to the point that I was thinking about starting over — requiring another trip to Tap Plastics, which could take months! For now I’ll forge ahead, but I’m not going to glue the shower in right away in case I decide I can’t live with it.
Moving on. Besides putting off the shower assembly, the other reason I stalled on finishing the bathroom was because I was looking for marble paper to use for the shower surround and vanity countertop. Dollhouses Trains and More ordered some Itsy Bitsy Minis carrera marble wallpaper for me but when I saw it in person I didn’t like it. Same with marble contact paper — I just couldn’t find anything that looked real enough.
Last year when I started the bathroom, I painted a tub surround to look like marble.
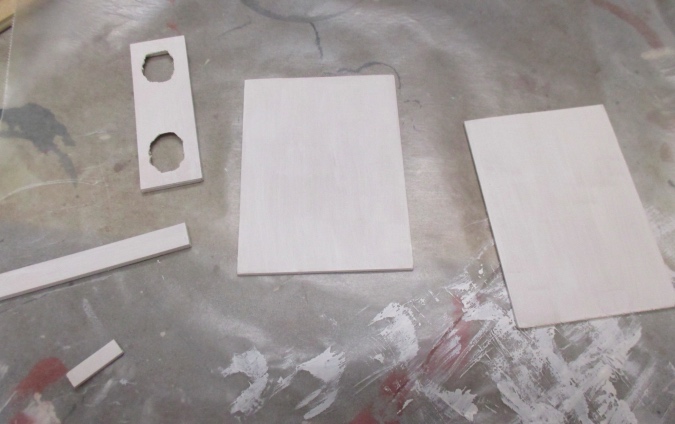
I ended up replacing this with the beadboard, and couldn’t remember exactly how I’d done it (I never blogged about it in detail), so what I came up with this time is slightly different. The first step was to paint the pieces white. I used a Behr paint sample called Bleached Linen.
Next I splotched on gray paint using a dry brush.
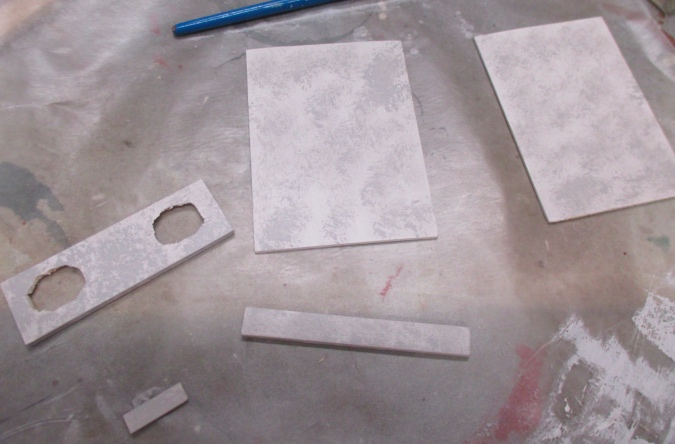
I covered this up with a thin coat of Bleached Linen, so the gray shows through.
Next I used a feather dipped in blue-gray paint to create veining. This one is a Glidden paint sample, and the color name is Slate Gray. I had read about using a feather for faux marble but honestly I’m not sure if I did it right, I just dipped the tip of the feather in the paint and swept it around haphazardly.
I added some Slate Gray splotches with the dry brush.
Then I toned it down with splotches of Bleached Linen.
Added a few more gray streaks. The feather was pretty paint-laden by this point so they’re sloppy.
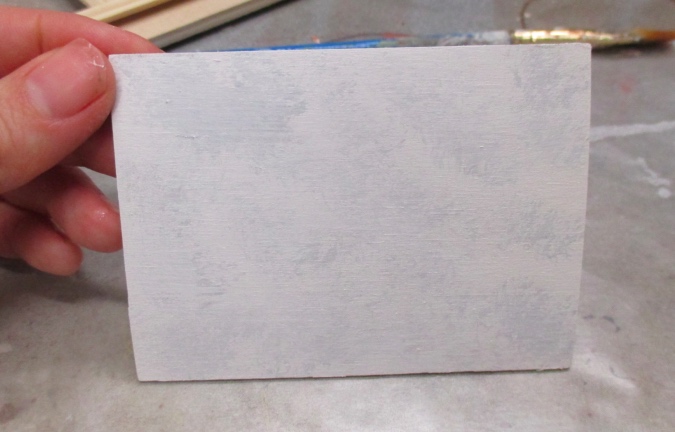
Next I did a coat of very watered-down Bleached Linen. I think this is the point where it goes from looking like paint splatters to looking like marble.

Once the watered-down coat was dry, I added a coat of gloss varnish. This stuff does’t give a high shine and might not have been the best choice, but it’s what I had. It looks more like honed marble than polished marble.
Here’s how the shower surround turned out.
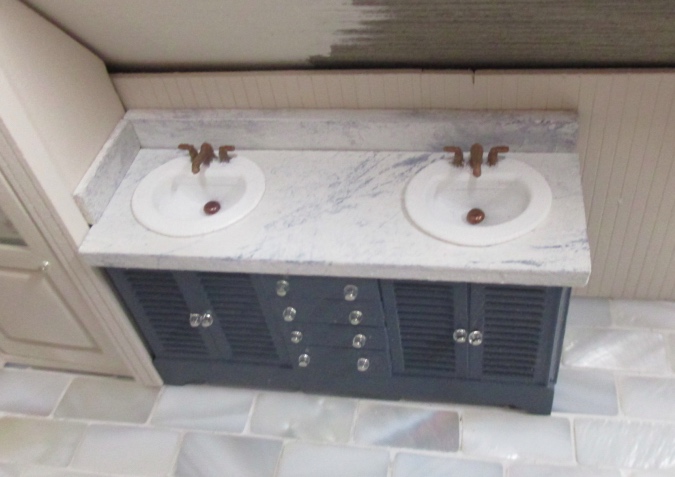
While the glue on the shower pieces dried, I finished up the vanity. The 3D printed sinks are from Mini Etchers and the faucet pieces are attached to the sink. I colored them in with bronze Sharpie and ended up with some Sharpie outside the lines.
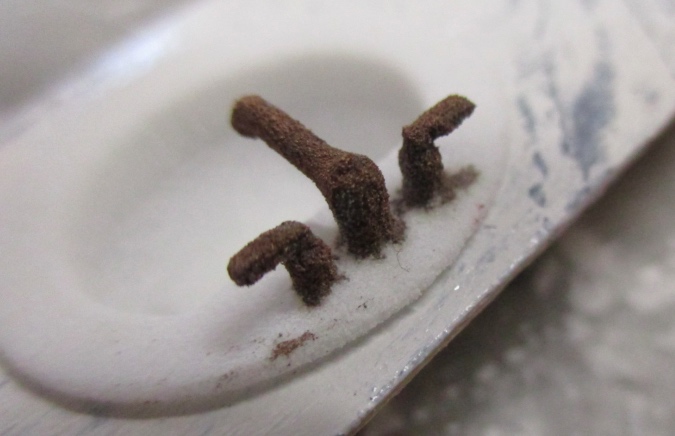
(Yikes, that close-up is creepy! The 3D printing does have a “crumby” texture but it’s not nearly as fuzzy and weird looking in person as it is in that photo.)
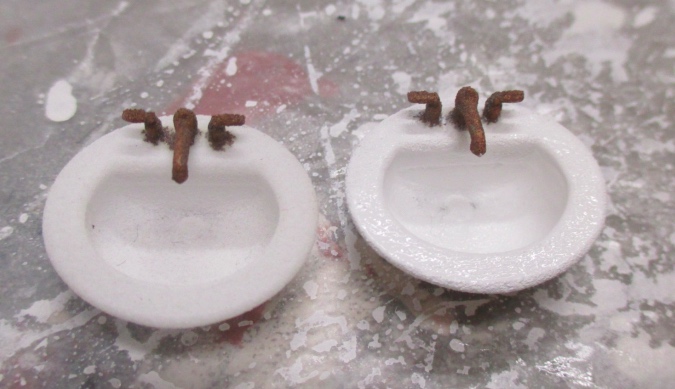
I tried touching up the pen spots on the sinks with white paint, and the paint was different enough from the (duller) white of the sink that I ended up painting the whole thing. Not sure if you can really see the difference in the photo, but here’s the painted sink with touched-up faucet on the right, and the non painted sink with non touched up faucet on the left. The white’s a little brighter and the faucet, while not perfect, isn’t quite as sloppy.
The sinks have a raised drain inside of them. I didn’t trust myself to paint this, so I covered it up with the head of a mini brad.
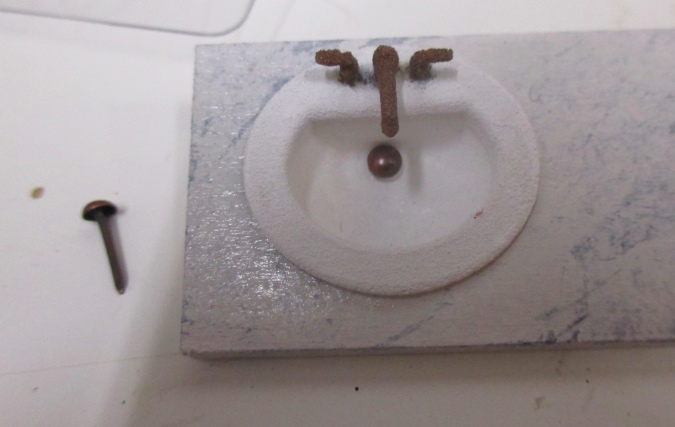
Originally the vanity was painted a shabby chic gray green color. This didn’t look good with the marble countertop so I repainted the vanity with the same Slate Gray I used for the veining on the marble. The pulls are made from clear seed beads and cut down pins.
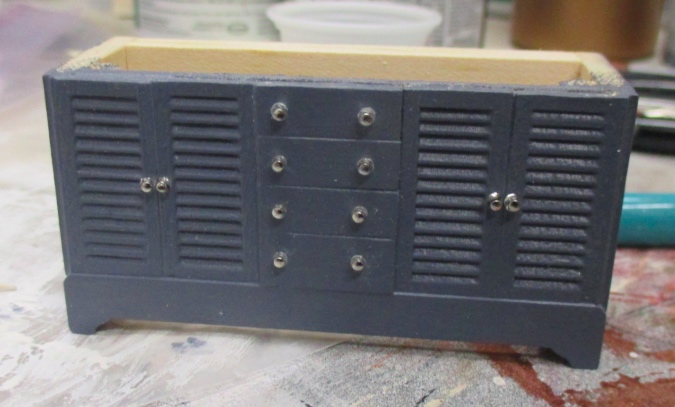
Here’s the finished vanity.
I’ve stopped here for now. I still need to make a floor and shelf for the shower and add the showerhead. Then I’ll get the rest of the wallpaper and trim in, and I can check this room off the to-do list!
 Emily is a freelance writer, miniaturist, and adventure game enthusiast.


Wow, lots of work done. It looks lovely so far!
I love your shower–so much so that I may redo mine. I and sending the link to mine, if you have a moment. I had planned on doing a show curtain, but now you have given me the courage to do a glass surround. I am just not sure where to buy the plexiglass and how did you drill the holes? Did you use a dremel? Does the door bend open? Your work is amazing. I’ve let my dollhouse sit since before Christmas because the electrical has failed and I can’t go much further until I figure out how to fix it, so I am enjoying watching you work. Thanks for the awesome tutorial.
http://annsdollhousedreams.blogspot.com/2017/05/
Your shower looks good! Since you already have a base, I think you could modify it to have a glass surround by gluing the plexiglass directly to the front of the base pieces, and then glue another piece of strip wood to the bottom front of each panel – so it will look like the plexi is sitting in a channel, but it will actually be sandwiched between two pieces of basswood.
I bought the plexiglass at Tap Plastics. From their store locator it seems like they’re mainly in California and the Pacific Northwest. You can order plastic cut to size through their website but I haven’t tried that before. Or you might be able to find plastic sheeting at a hardware store or hobby shop. Having them cut the plastic to size is the reason I like to go in to the store.
We drilled the hole using a standard drill bit in the power drill. First we used a slightly smaller bit to make a pilot hole, and then the larger bit the same size as the wire (which was purchased in the jewelry section at Michaels). The pilot hole helps keep the plexiglass from cracking. The plastic heats up and gets stuck in the drill bit so you have to drill it quickly (that’s one reason I didn’t trust myself to do it!) There are also special plexiglass bits that you can buy but I was too impatient. (Which is funny, considering how long those pieces of plastic were sitting around waiting to be assembled…)
The door doesn’t open. I’ve done two other plexiglass shower surrounds – one over a tub with a false door, and one in a shower stall with a sliding door that does open. You can read about those here: http://www.emilymorganti.com/blog/?p=8244
Thanks so much for your reply. I may just start all over with the base because yours looks so clean and perfect and I will check around the glass shops here to see if they would make the cut for me. Otherwise, I’ll try the online store. Love watching you work. ann
Awesome as always. Thank you for sharing.
I love your marble and how everything looks! Nice spacious bathroom.
I don’t even notice the lines on the shower door. But if you do then you’re right, wait and see if you can live with it.
You might want to check and see if some scratch filler will work. They used to sell stuff that you could put on eyeglass lenses when they got scratched? Supposedly you wouldn’t notice the scratches after using it. Can’t remember what it was called but your hobby shop might have something similar.
Thanks for the tip! I’m not sure if that will work since the scratches are so close to the seam (not sure if I can get the scratch filler in there) and also because I think they’re now filled with glue. But it can’t hurt to try, I’ll see if I can find some of that stuff.
Tried it, it didn’t work. :(
You have certainly maximized every inch of your bathroom’s generous floor space! and I love the way you have inserted the linen cupboard in under the sloped roof as well as how you’ve refurbished your double vanity which looks perfect next to it.
I also admire your marbled glass shower stall and your methods of making the handle without slopping the glue all over the glass door which is an invaluable tip!
I’m sorry that you have some unforeseen scratches on one of the panels but perhaps Sheila’s recommendation will do the trick.
Hi Emily, You have made wonderful progress and given us lots of interest on your processes. …. if only I will remember them when I need them!
It is really looking good and I like your vanity colour so much.
All the best
Janine