Almost three years have passed since I packed up 17 dollhouses (yikes), ~20 bins of furniture and supplies, and more kits than I care to count and moved from one 1:1 scale house to another. Even though the move was only 25 miles, getting the houses packed up, transported, and unpacked was a huge effort that I hope never to repeat.
The new house didn’t have a dedicated place to put the dollhouses, so they were scattered all over the house and garage until Geoff built me a workshop in the garage.
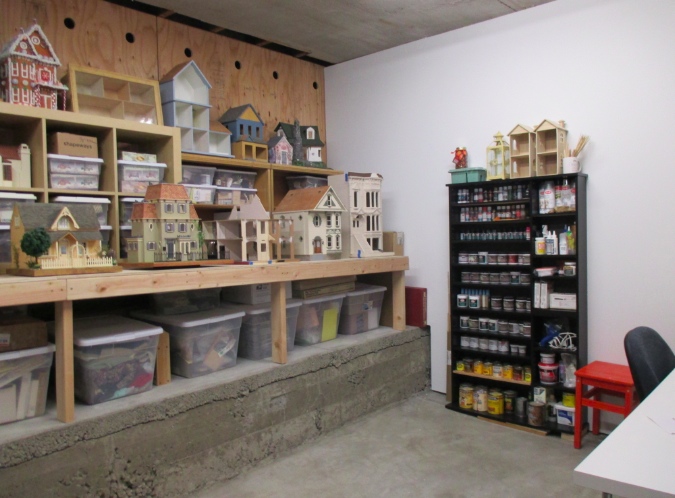
The new workshop has proven very good for working in — I have plenty of space for all of my supplies, easy access to tools, and a lot of table and floorspace to spread out on. But it’s turning out not to be great for displaying houses, for a few reasons. The countertop we built for the houses to sit on, with storage behind the houses, isn’t really convenient for setting up furniture. Things get banged into and lost. And don’t even get me started about the rat that was living in the rafters all winter. (Yes, really. Ugh.)
About six months after we moved in, I discovered that the Victorianna’s bathroom floor tiles had changed color. The garage has two west-facing windows and these were shining direct sunlight on the dollhouses for a few hours each afternoon. It didn’t occur to me that this was a problem until too late. (I posted about fixing those tiles here.)
Over time, there have been a lot of problems like that. I’ve become so frustrated with the dollhouses falling into disrepair that we’re rearranging some of our 1:1 furniture (can I get away with making that joke a second time?) so I can move some of the more finished dollhouses out of the garage. While doing that, I’m trying to fix things that have broken and finish small things I never got around to when I was working on the houses. (I have a problem with finishing projects!)
Which brings me to the Rosedale’s tiles. Yep, it happened again.
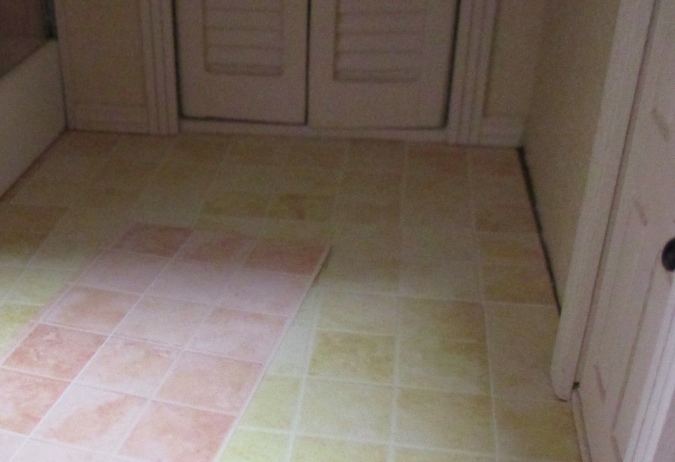
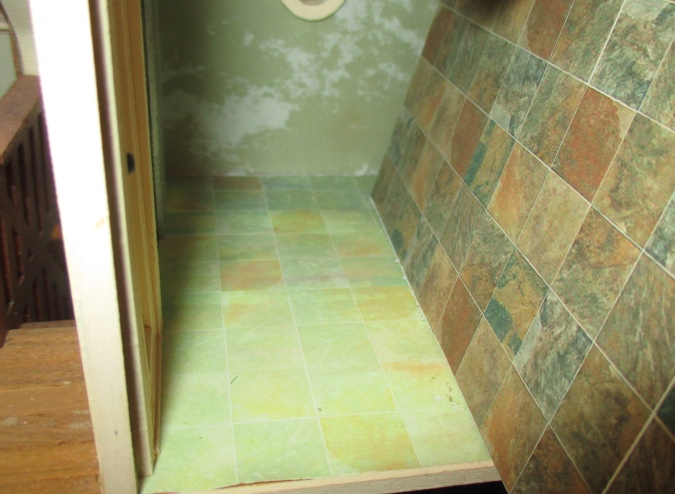
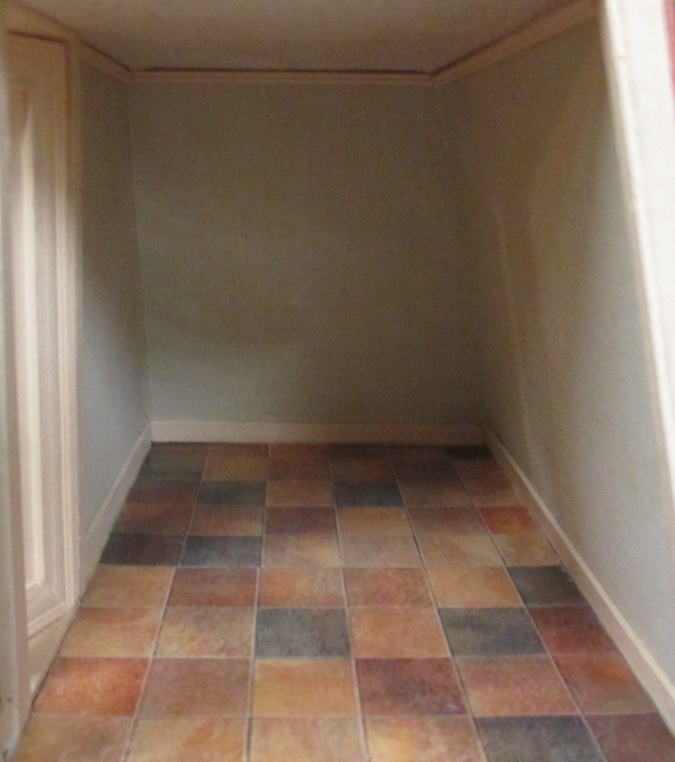
The Rosedale has two rooms — a bathroom and a laundry room — with floor tiles I printed on an inkjet printer back in 2011. I’m not exactly sure when or how they got messed up. As far as I can remember, they looked totally fine up until the move. I took pictures for my Rosedale gallery about six months after moving, and you can tell in those photos that they’ve started to change, but they still looked a lot better then than they do today.
The Victorianna is open on the sides, which put the bathroom in the path of the sunlight coming through the window, but the Rosedale’s open back has mostly been facing away from those windows. So… who knows what the real culprit is? A mix of sunlight and moisture? The garage isn’t climate controlled, but it isn’t particularly damp either.
While searching through my stash for tiles to replace these with, it occurred to me that I probably still had the original files. (My computers are like my workshop — nothing gets thrown away!) Because these are such simple rooms and I’ll soon be moving the Rosedale into my climate controlled dining room, I decided to take the risk of using the same printed tiles again.
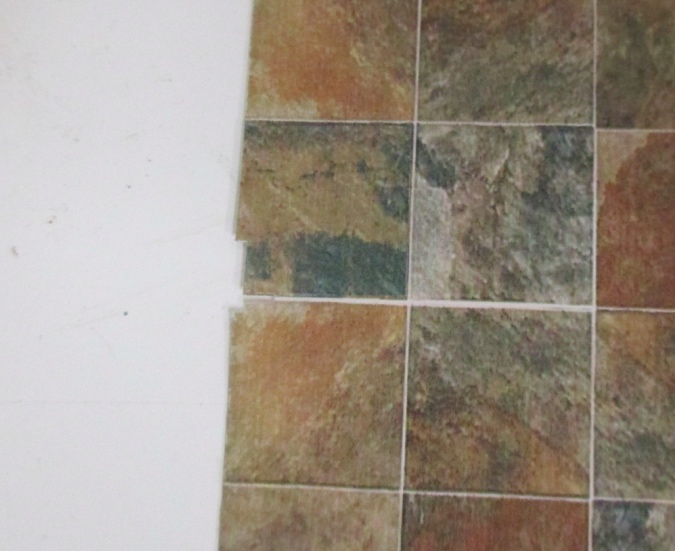
Here’s how the faded bathroom tile looks next to a new printout of the same tile. Wow.
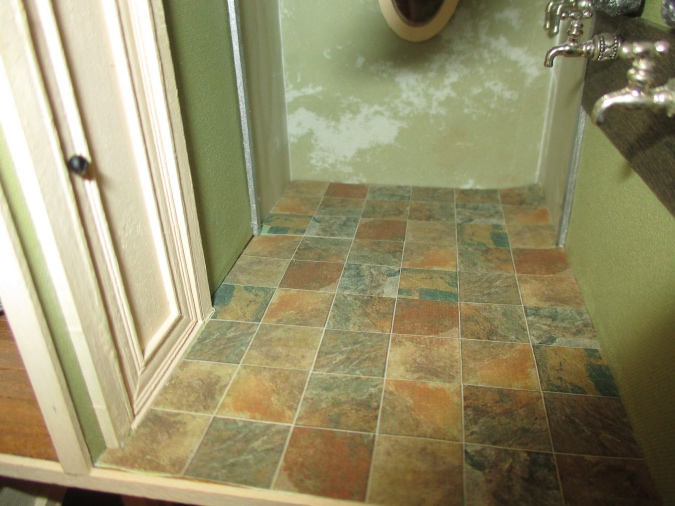
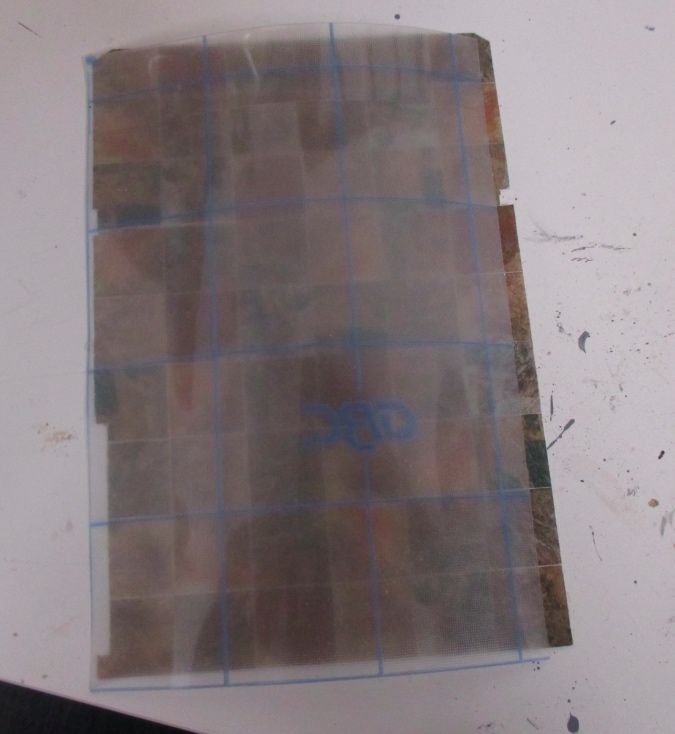
I removed the bathroom baseboards and cut notches to fit the tile around the door and shower trim.
I don’t know what I was thinking here — I cut much too big a notch on this side. It would have been hard to see behind the toilet, but it bugged me. Not enough to go upstairs and print out another copy, but too much to leave it how it was.
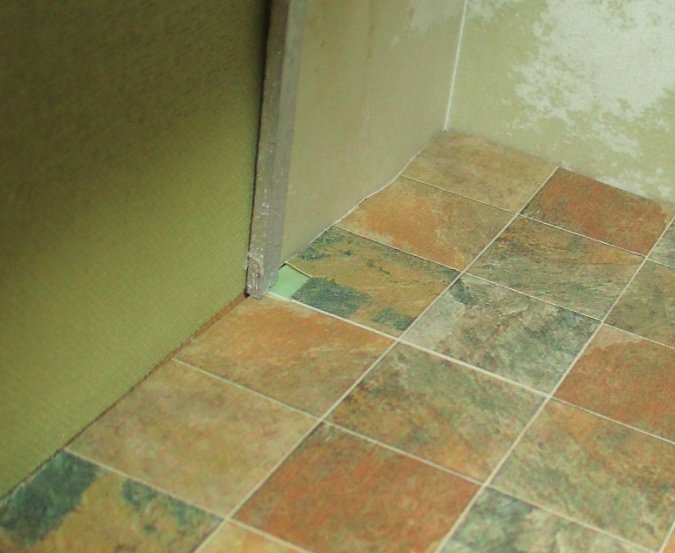
I had another of the green tiles from a strip I cut off the end of the printie when I was cutting it down to fit in the room.
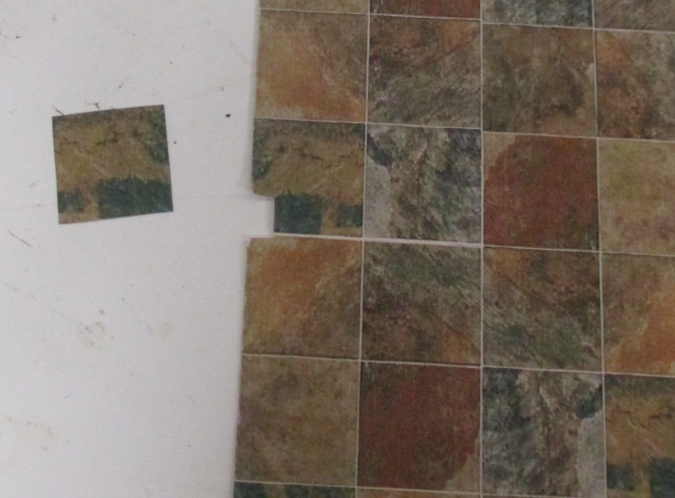
I glued this on top of the one with the too-big notch, and cut a much thinner notch.
Next I covered the printie with self-stick lamination paper. This is the same stuff I used in the Blackbird Bar to protect the floor. I’m hoping it will provide some protection from whatever caused the fading and bleeding. (I didn’t spray matte sealer on the tiles, as I normally would, just in case that had something to do with them getting messed up in the first place. Seems illogical but you never know.)
Look at that shiny tile! I opted not to use wallpaper mucilage on this, since I’ve had issues with that staining printed wallpaper, and instead glued it down with a gluestick. But I think the gluestick was too old, because it was clumpy and didn’t spread well. As a result the floor is a little bumpy, but hey, it’s slate!
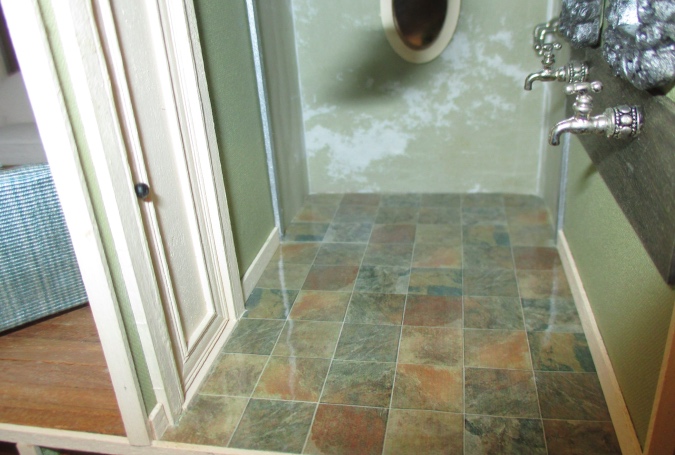
This looks SO MUCH BETTER. I’m so glad I took the time to fix it. It could be the lighting of the photo, but I think it even looks better than the original tile (which was printed on a different printer, possibly with a dying ink cartridge).
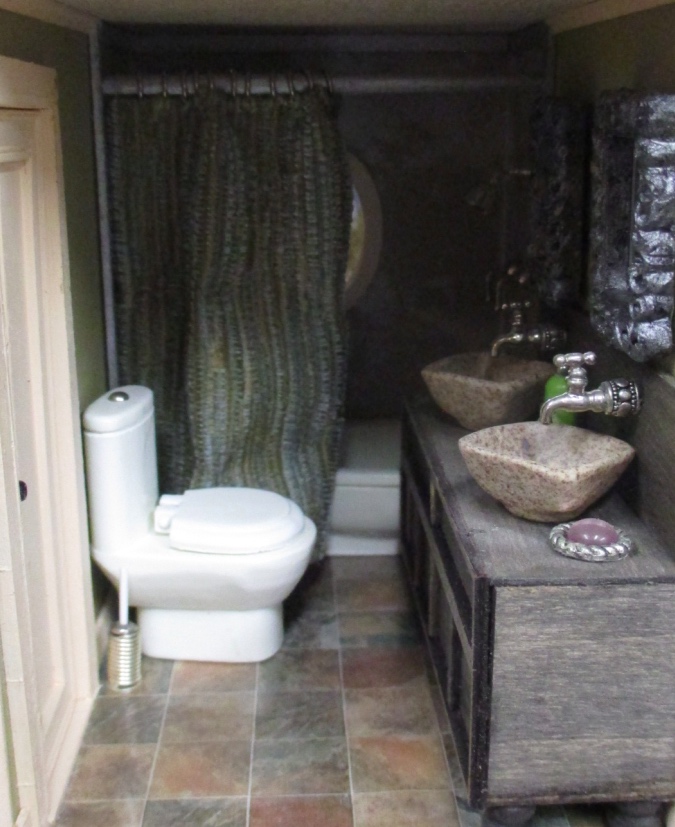
In the laundry room, the baseboards didn’t want to come off so I left them on and got the flooring as close to the edges as I could.
I glued this one down with Mod Podge, which caused the paper to curl and made slipping it in a bit harder. It doesn’t have the baseboards holding down the edges, so hopefully it won’t curl up over time.
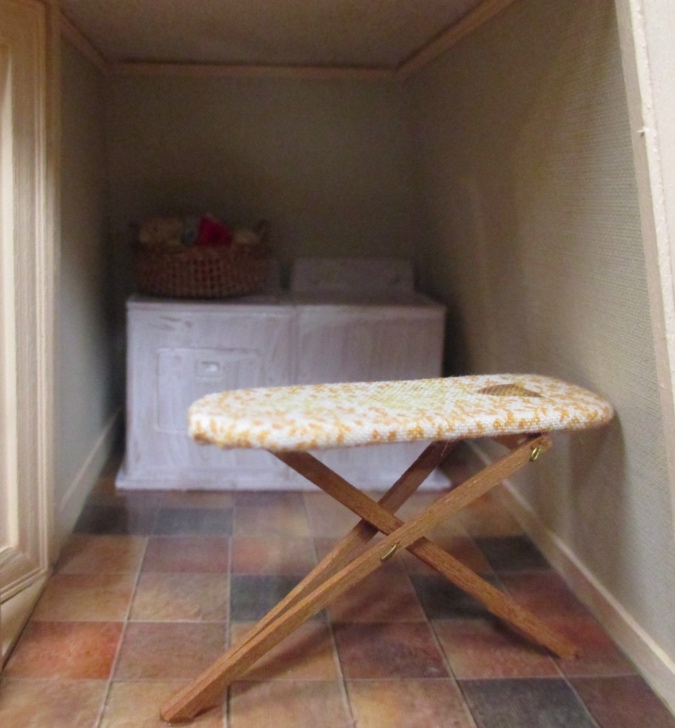
(Ignore the streaky washer and dryer – I tried painting and didn’t go about it the right way. I’m going to buy some glossy spray paint instead. Just another thing that needs fixing…)
The other thing I fixed today turned out not to be broken at all, which was a huge relief because it could have been a major headache. Back in November I added a stained glass window to the Gull Bay Cottage’s door, but when I went to turn on the lights to see the stained glass, two of them didn’t work. I put off figuring out why until today, when I moved the house to its new home in my living room.
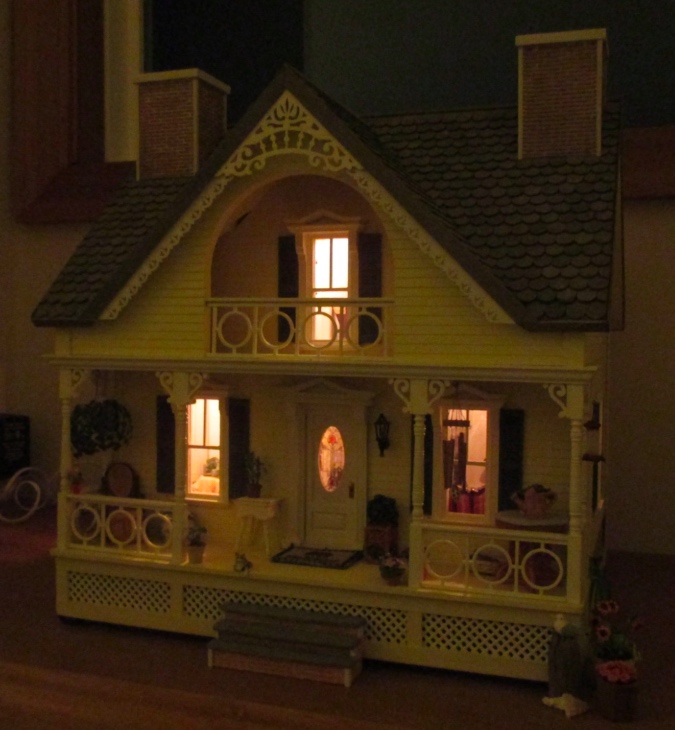
(Yes, there’s a window behind it. Since this house is fully enclosed, I’m not worried about putting it near the window. I hope I don’t live to regret it.)
It turned out one of the plugs was loose in the tape wire. When I pushed it back in, the kitchen light that plugs into that plug worked again. I don’t even know why the living room light wasn’t working when I tried six months ago — today, it just did. Whew! Thank you, electricity gods. I owe you one.
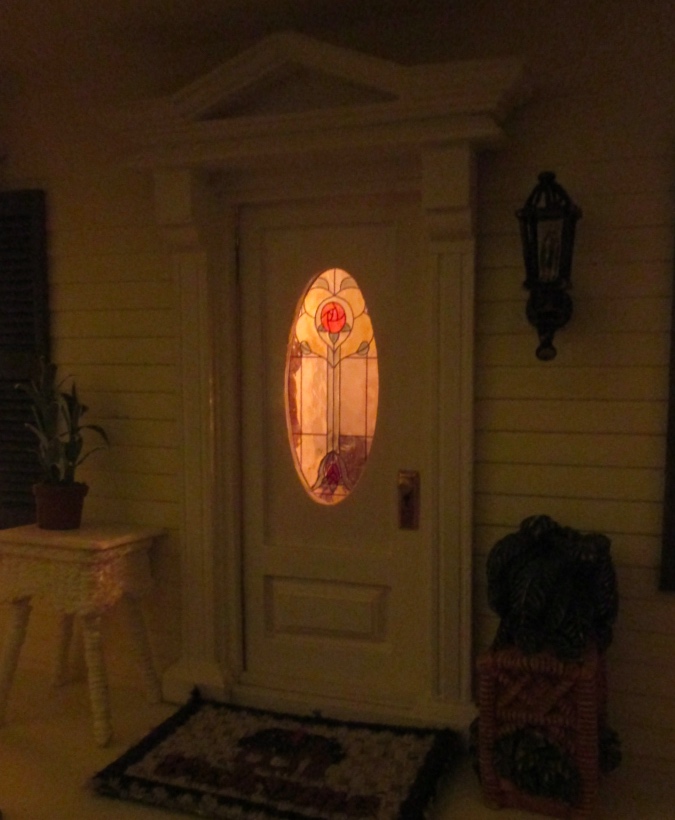
(Note: the porch light isn’t supposed to light up, it’s just for show.)
 Emily is a freelance writer, miniaturist, and adventure game enthusiast.


Of all the problems that make me crazy, electrical ones are the worst. I still can’t figure out what’s wrong with my beach bungalow and I’m at the point where I don’t care much.
I’m so glad you were able to fix your floors. I’ve noticed the sun will fade some of my old pictures so I wonder if that was doing it? I hope the second floors stay the same colors now that you’re moving the house inside.
My Fairfield and Queen Anne Rowhouse are also wired and I dread plugging them in. One of the Fairfield lights was broken the last time I tried and would require pulling up the skinny stick hardwood floor in the room above it to fix. I love how the lights look when they work, but realistically I only turn them on for a few minutes to look at them, and then turn them off again. It’s a lot of work and a big expense for not much payoff. But then again, I didn’t wire the Victorianna and the rooms are deep and dark, which is also frustrating.
For the Gull Bay it was a necessity since the room is fully enclosed and such a pain to slide open. There’s really no other way to see what’s inside.
Sorry about your Beach Bungalow. :( Can you use battery-operated lights? Miniland has a good selection: https://www.miniland.ca/Lights_c_17.html
The Bungalow was my first attempt at electrical that wasn’t battery lit and the tape wire doesn’t seem to work well with MDF. Maybe I’ll get up the gumption to rewire the lights but part of me doesn’t care. The house seems really big and annoying a lot of the time.
The last couple projects I did had wired lights and they work fine but I didn’t use tape wire one either of them.
At a dollhouse show near Seattle, dollhouses were for sale. I learned that one can avoid the electrical cumbersome job by placing a motion detector light at an inconspicuous place and voila, let there be light.
I just love your blogs. I too am moving and packing up all my minis was a challenge. We sold our house in VA in November and all my mini stuff has been in climate controlled storage. We should be heading to Texas by June. I still won’t be able to unpack until the end of the year because we are having a house built. I’ m praying that everything will be ok but I’m sure I’ll be scouring your site for answers for fixes.
I do have one question. My color printer is on its last leg. Can you recommend a good color printer? I currently have an Epson XP-800.
Thank you again for your detail and inspiration.
Good luck with your move! Waiting to unpack my minis after we moved in was hard. I still haven’t put the furniture back in most of the houses but I will do that as I move them out of the garage. Maybe you can work on a smaller, self-contained project while you’re waiting?
In December I bought an HP DeskJet 1112, solely because it was cheap — only $29.99 and comes with a starter ink cartridge, which I haven’t used up yet. (I’m only using it for minis.) I don’t remember what I had before but it was at least 10 years old and didn’t want to run with Windows 10. The technology’s just gotten a lot better. Also, it’s very small and simple, easy to put away when not in use.
https://www.bestbuy.com/site/hp-deskjet-1112-printer-white/4363423.p?skuId=4363423
You touched on a very sore spot for me: electrical. Same problem: a light works today; tomorrow it doesn’t. I think I am pretty small scale compared to your garage workshop. Mine is a corner in the basement family room, a large room with plenty of space; however, I share the space with two 110 gallon aquariums and one smaller hex shaped tank. The tanks evaporate a lot of water. I fear that the humidity affected my tape wired dollhouses, three of them are wired, including the one I am building now. The manufactured wood that the the Bellingham Farmhouse is made of especially is affected by the humidity. The older farmhouse that I restored has issues too, but is may of real plywood. I don’t know what the answer is. Next house I will use fewer lights and maybe the LED battery operated ones. We bought a dehumidifier that takes the moisture out of the air. When we first installed it, we had to empty the 3 gallon tank two the three times a day. Now it runs only at night and I think we have the stabilized the humidity in the room. Colorado has very dry air and humidity in the house is nice, but just as sun can rot fabrics and fade color, moisture can be troublesome, too. I always enjoy reading your thoughts and ideas and now I know to keep the houses out of the sunlight.
Oof, that sounds like a problem, I hope you get it figured out. We live near the ocean and the garage isn’t insulated, so it could be that the air down there is too humid or the salt in the air affects the ink or something like that, I just don’t know. Also the windows in the garage are 90+ years old and probably don’t filter UV the way newer windows do. It’s insidious, though, you don’t realize something like this is happening until it’s *really* bad!
Wait until you see the messed up printie wallpaper in the Queen Anne Rowhouse. It’s this same problem but even worse. :(
Hi Emily
One of my friends had the same problem with the manufactured wallpaper fading in her dollhouse too. She lives on the beach and her dollhouse is in her sunny work room and close to a window. She didn’t notice how much the paper had faded until she moved some furniture and saw how much of the color had gone. With no other options for the dollhouse, other than in her work room, she now keeps it entirely covered with a sheet to protect it from the elements, which is sad yet necessary.
As to your on-going problems with the electrics, I too find it to be perhaps THE most frustrating aspect of this hobby- PERIOD.
Even so, I am glad that your electrical problem involved nothing more than a plug. We need these kinds of little blessings every once in a while , don’t we? :)
I’ve wondered about home-printed things fading over time — I know some photos do, as I printed a number of them at home when my girls were little, some of which have noticeably faded. That’s another reason to keep track of how we’ve made things, isn’t it! Different papers, different sealers, etc. I’m sure will all give different results.
I’ve been reading up on this lately and apparently there are two different types of color printer ink: dye-based and pigment-based. The pigment inks are supposed to last longer. (You can tell the difference because the dye based inks come all in one cartridge; the pigment based inks have a separate cartridge for each color.) Also the type of paper you use with your specific ink apparently makes a difference. I’m using a different printer now than the one I printed out those floors on, but it’s also dye based, and I haven’t had it long enough yet to know if/how much the colors will fade over time. I’m kind of scared to use anything color printed in my dollhouses in the meantime.